For an example of the mercahdise discussed in this article click here.
There are excellent, easy to use web sites that enable you to print all manner of merchandise. From t-shirts, water bottle, fridge magnets to shower curtains, mugs, stickers and banner, pretty much its possible to print onto anything. For example:
vistaprint.com, threadless.com, uprinting.com
These site do all the hard work for you. The only thing (other than pay!) that is required of you is to upload a good artwork file. And by good I mean art work of razor sharp quality, correct color mode, with fonts delt with. Sounds intense if your not a graphic designer, but really its a few simple steps that I will show you.
To ensure successful printing on merchandise you need only to know a few simple ticks:
1. Ideally your file should be a Vector not Raster file. So an Illustrator file, not a photo shop one. For more on Vector verse Raster files click here. Essentially all you need to to understand is that a Vector file will always maintain its sharp quality, no matter how much you scale it up or down. Where as a Raster file will get fuzzy and pixelated. Therefore we will be working with a vector illustrator logo file here.
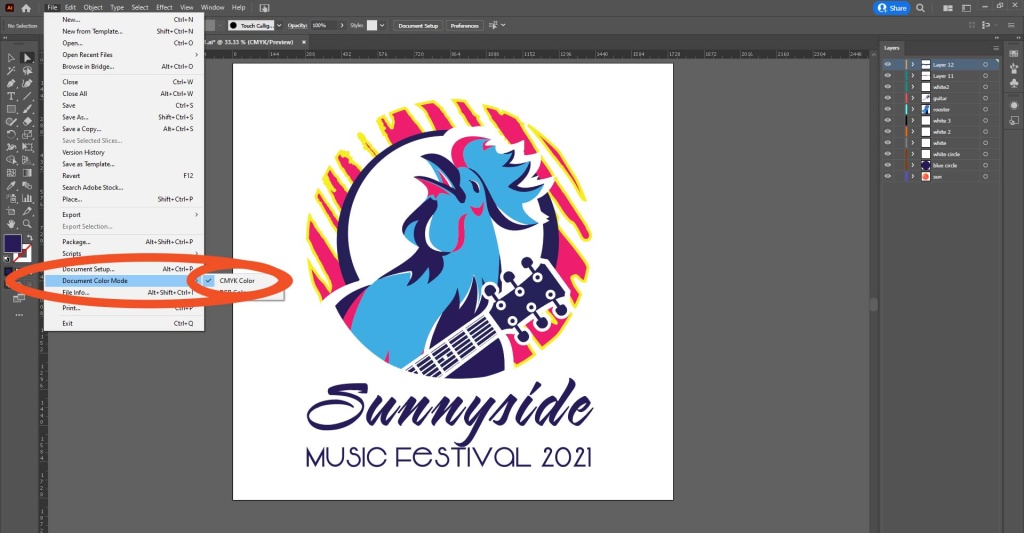
2. Color Mode: Images on the web are in RBG mode, where as images for print are in CMYK mode. Pretty much this again boils down to quality. (for more on CMYK v RGB click here, or save yourself the time and just trust me, make it CMYK!). To do so select File > Document Color Mode > CMYK
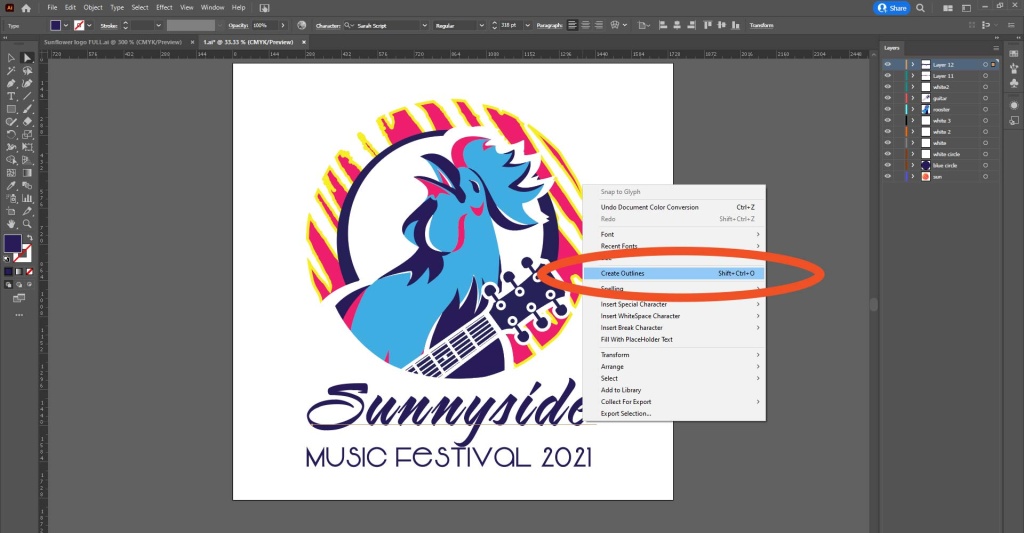
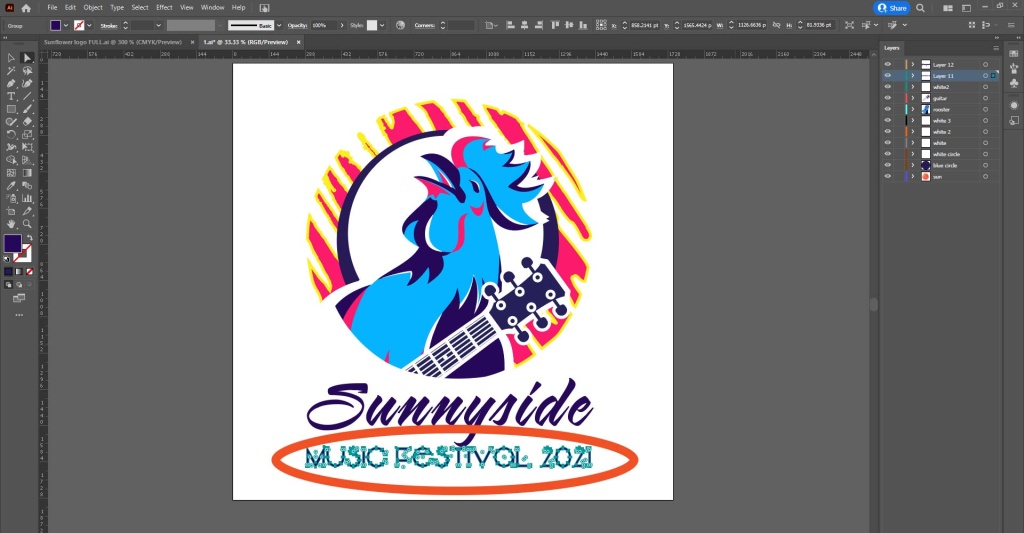
3. Font: If you file is opened on a devise that does not have your chosen font installed on it, then Illustrator will substitute with another font. Your have no control over this, but your art work will be altered with undesirable results. To ensure your logo text always appears exactly as you want it to you need to turn it from editable text into an object. To do this select the text > right click > outline Text. Voila, your words are no longer text, they are now objects with paths, and as such no matter where this file travels no change will occur. Do this for all text.
4. Finally save your Illustrator file. Go to File > Save As , and under File name in the dialog box select the drop down for Save as Type. To cover all your bases Id save the file 3 times, as a AI file, an EPS file and a PDF. That way no matter what format your printer wants, your ready!

More Big Orange Knowledge
April 2, 2024
Anatomy of an Online Scam Called “Animation Inquiry”
Online scams are regrettably endemic. If you're reading this post, it means…
April 25, 2023
Importing Compositions from one AE file to another
To import compositions from one AE project into another you need to do the…
July 3, 2025
Indexing vs. Ranking: What’s the Difference and Why It Matters
Denver Web DesignOrganic SEOGoogle indexingSEOGoogleGoogle ranking
Indexing = Your site is in Google’s database. Ranking = Your site is showing up…
April 21, 2023
What defines a successful logo & why you need one.
A brand begins with a logo- a visual communications synopsis. Our design team…
April 26, 2023
The Top Web Design Trends in 2023
Web DesignSEOLogoEcommerceDenver Web DesignGraphic DesignBranding
Every year, there is an increasing demand for Denver web design services due to…
April 24, 2023
Tricks using Illustrator files in After Effects
To use Illustrator files successfully in After effects you need to know a few…


